Meta Ads for Beginners: A Practical Setup Guide (2026)
Running your first Meta ad is easier than it looks — and harder than the “boost post” button makes it seem. This practical guide takes you from zero to a live campaign, explaining the structure Meta actually uses so you don’t waste budget learning it the expensive way.
What You Need Before You Start
- A Meta Business Portfolio with an ad account inside it (see our setup guide).
- A Facebook Page for the business.
- A payment method added under Ad Account Settings → Billing.
- Something to advertise — and a clear goal (sales, leads, traffic?).
Understand the Structure: Campaign → Ad Set → Ad
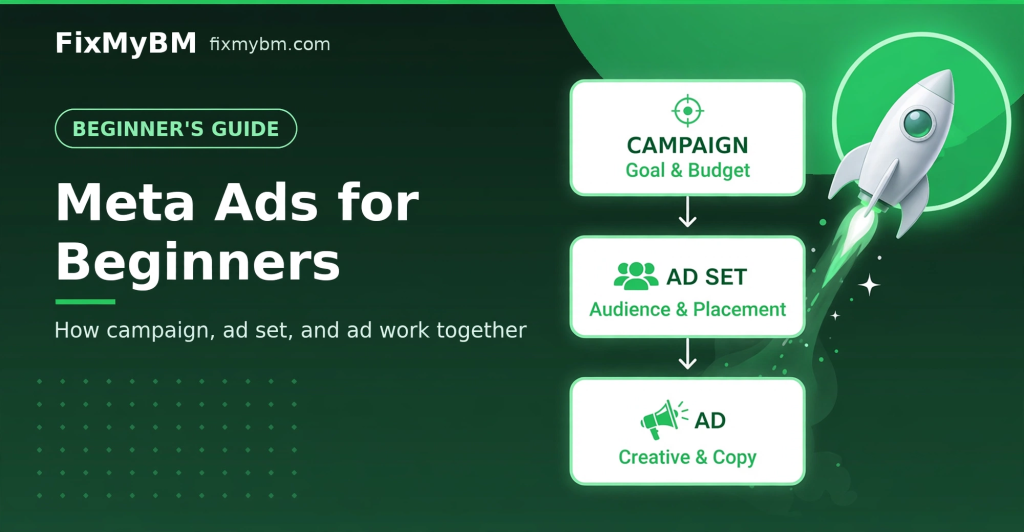
Meta organizes everything in three levels. Get this right and the rest clicks into place:
- Campaign — the objective. What do you want? Sales, leads, engagement, traffic. One objective per campaign.
- Ad Set — the who and how much. Audience, placements, budget, schedule.
- Ad — the creative. The image/video, headline, and text people actually see.
Beginner mistake #1: mixing objectives in one campaign. Keep it clean — one campaign, one job.
Step-by-Step: Launch Your First Campaign
1. Pick the right objective
In Ads Manager, click Create and choose the objective that matches your real goal. Selling products? Choose Sales. Collecting emails? Leads. Don’t pick “Engagement” hoping it magically becomes sales — the algorithm optimizes for what you tell it.
2. Define one audience
At the ad set level, start with a single, sensible audience: a location you serve, an age range, and 2–3 interests related to your product. Beginners do better with one focused ad set than five tiny ones.
3. Set a test budget
Start small — enough to get meaningful data (think daily budget × 7 days as a learning window), but an amount you can afford to spend while learning. You can scale what works later.
4. Make the creative do the work
At the ad level: one clear image or short video, a headline that states the benefit, and primary text that says what happens when they click. Ugly-but-clear beats pretty-but-confusing every time for beginners.
5. Pre-launch checklist
- Correct Page and Instagram account selected
- Destination URL works and loads fast
- Budget, dates, and audience look right
- Ad copy has no banned claims (check the ad policies first)
- Payment method active
Then publish. Review usually takes minutes to a few hours.
Reading Your Early Results (Without Panicking)
Give a new campaign a few days before judging it. In the first 48 hours, check only: is it spending, is it delivering (not stuck in review or limited), and are the basics (CTR, CPC) in a sane range for your niche. Don’t rewrite everything on day one — early data is noisy.
Beginner Mistakes That Burn Budget
- Editing the campaign every few hours (resets learning).
- Targeting everyone “18–65+” with no focus.
- Running traffic campaigns and expecting purchases.
- Ignoring the ad policy rules, then wondering why ads get rejected.
- Scaling a losing ad instead of fixing the creative or offer.
FAQ
How much should a beginner spend?
Enough to learn from — a modest daily budget for at least a week per test. Never spend money you can’t afford to lose while learning.
Boosted posts vs Ads Manager?
Ads Manager, always, for anything serious. Boosting is a shortcut with fewer controls; this guide uses Ads Manager.
Why is my ad “In Review” so long?
Most reviews finish within 24 hours. If it drags on, check for policy flags in Account Quality.
Want Help Setting Up?
If you’d rather have your first campaigns structured correctly from day one, message us on WhatsApp — campaign setup and consulting is what we do.